Sunday 9 October 2016

Let's make... Christmas tree decorations [part2]

In this second festive DIY post, I'm going to show you how to make more Christmas tree decorations and these are a little more personalised. Once again though, they begin with very basic items you will most definitely have lying about the place.
 
The first decoration is something very special indeed - an anniversary memento of a baby's first Christmas. Made to be cherished and brought out to hang on the tree every year. And what makes it even more special is that it is made from the lid of one of his baby-food jars!
 
 
It is pretty straightforward to make as you can see from the following directions...
This one was made for my great-nephew who lives in Germany :)

Print off the photo of your choice and cut it to the correct size to fit inside the lid.
 
Most jar lids have a vacuum indentation so I recommend cutting out a piece of card and sticking the image to that before sticking into lid; this gives a nice smooth base.
 
As this is a memento, some wording that marks the occasion is always a good idea.
You can of course put this on the front, instead of the image [or as well as the image] but, I've chosen to put it on the reverse.

As with all my wording, I type it, print it out, cut it down and then immerse in a little warm back coffee; this takes off the stark white new paper look.

Finally if you wish, edge the image with a little glitter glue, which sparkles off the fairy lights perfectly when hanging on the tree <3
 
Now come a few other ideas for novel decorations and the first is made using a... beer bottle cap!
 
As with the memento, put your words [or image] on a piece of card first before adhering into the cap. The twine will need to be super-glued around the cap and this is very fiddly but you'll get the hang of it. This is particularly poignant with a loved ones name or image on.
 
 
The next idea is glittery paper cones with golden ribbon that hang beautifully on the tree.

I have already blogged about how to make these here
 
The next idea is made from a... screw top lid from a bottle of wine!
This one is so light, it can placed directly in amongst the Christmas tree branches. The inside of the bottle top is painted with glitter glue and when fully dry, some wording of your choice can be added. The white ribbon gives it a very angelic look. 
 
And so we come to the final idea and it is made using a... sushi bottle!
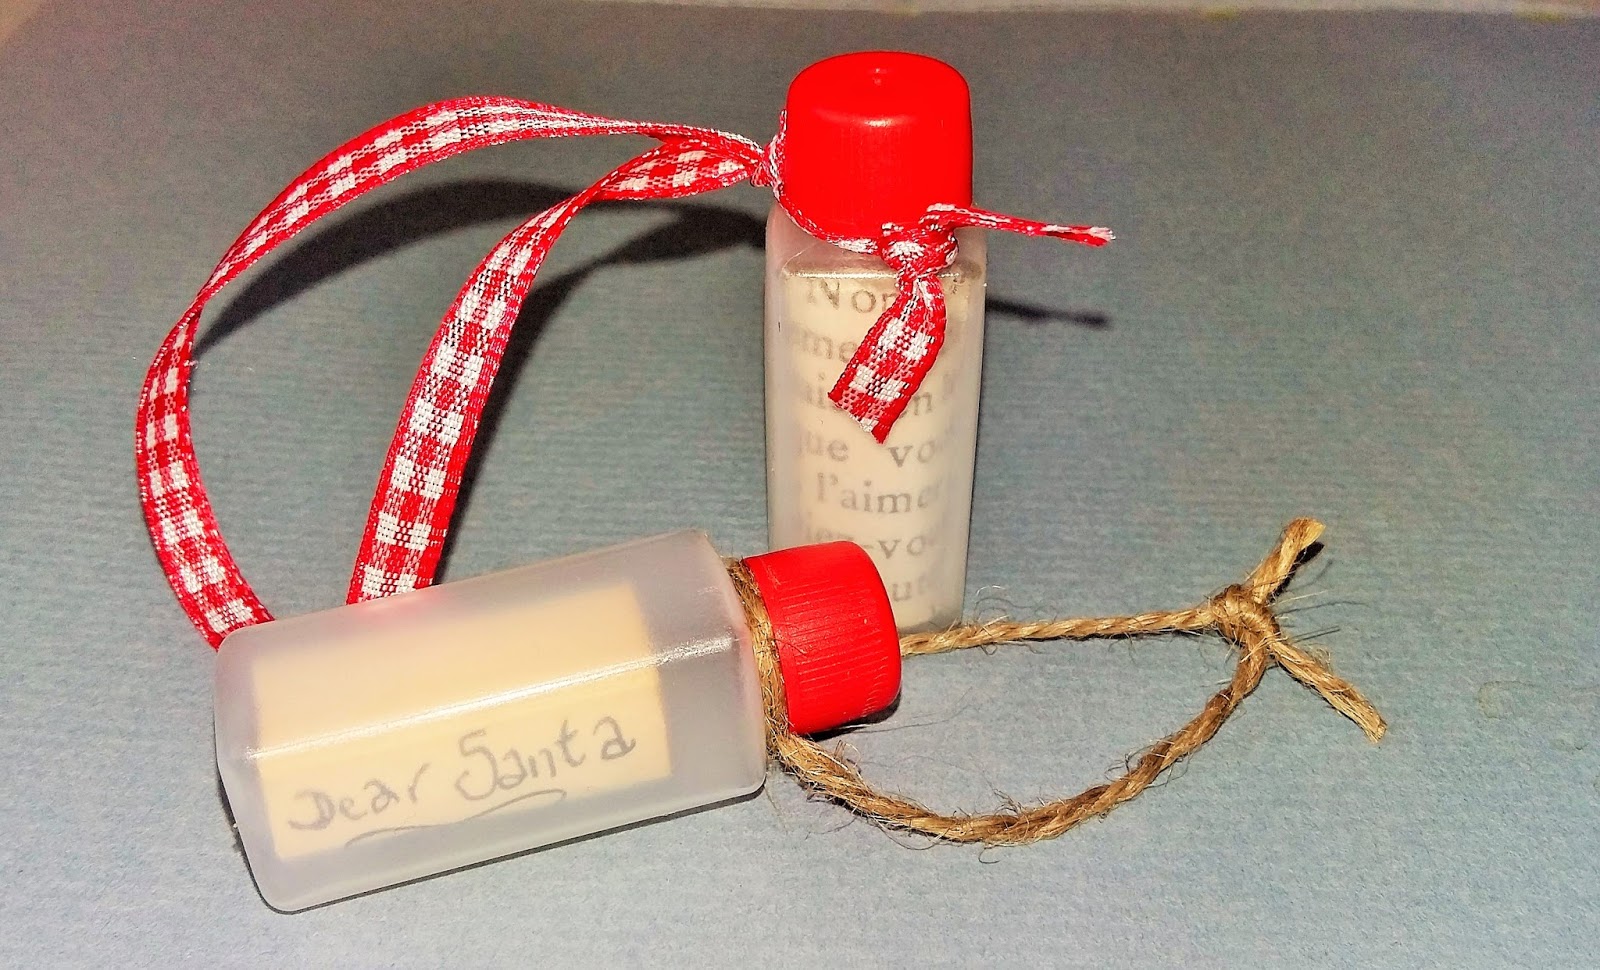
I'm sure you've all bought sushi packs for lunch over the years, but did you ever think of cleaning the little plastic soy sauce bottle and using it to hang on the Christmas tree? Possibly not :) But, this is the perfect receptacle for a child's mini Santa list or any sentimental message. The red cap makes it already fairly festive looking but a strip of red gingham ribbon finishes it off to perfection! This is an especially nice easy project for younger children to work on.


Let's make... Christmas tree decorations [part1]

Troedyrhriw Angel
I love Christmas and start thinking about it around August time. This is because when I was growing up money was tight and so my Dad would clear a shelf in the pantry during August and purchase something Christmas related in each weekly grocery shop from then on. Seeing that shelf get fuller and fuller made me so excited... pickled onions, piccalilli, After Eights, Mr Kipling mince pies etc. and so it grew.

Sadly, many of our  precious childhood Christmas decorations are now lost. However, one item we do still have is the beautiful angel that sat atop my maternal Grandmother's tree for most of her long life. Some years ago I photographed her and then made a Christmas craft range that proved very popular [I will post about that very soon and put a link here]. I call her Troedyrhriw Angel because that is the village in Merthyr Tydfil [South Wales] where my Granny lived.

However this first of two festive DIY posts will show you how to make a selection of Christmas tree decorations from basic household items! And, they're pretty easy to do so most are suitable for children if supervised. This is what we'll be looking at in this post:

Glittery bells made from plastic egg box cups
 
 Curved bells made from actual egg shells! 
 
Shiny hanging discs made from sweet wrappers

 
How to make the egg box bells
Plastic egg box

It's tricky cutting the bells out but persevere and, as well as the cups, cut out the
middle tower sections as these can be used also
Next you need to punch a hole in the top to thread the ribbon or string through. Best way to do this is to get a wad of cotton wool or kitchen paper and firmly place into the bell. This lessens the chances of the plastic splitting. A small sharply pointed instrument is needed to make the hole, like a large safety pin or the fine end of a pair of scissors [adult supervision needed here]. 
 
Next comes the fun but fiddly bit! Decorate the cups and towers with glitter glue
 or you can of course, use glue and dip or sprinkle regular glitter
When dry, and I mean FULLY dry, thread a length of looped ribbon or string through the hole. If using glitter glue [recommended for best results], this can take hours to dry so best kept away from impatient little fingers over-night.
 
Some finished bells


 How to make the egg shell bells
 
A used egg-shell is very delicate so must be handled with caution all through this process. The first thing to do is to punch a small hole in the tope of the shell to hang the looped ribbon or string through. The same process of cotton wool or kitchen paper stuffed into the shell as used with the egg box bells, can be applied here to protect the shell from cracking. But be aware, even more care must be taken due to the fragility of the shell! 
 
The above image shows a shell with a layer of glitter glue already painted on the inside. Multiple layers of the glitter glue will need to be applied. Firstly, to build up the depth of colour and secondly, to make the shell harder.
 
 
The above image illustrates that you can choose to glitter up one side and paint a colour on the other, it is entirely up to you. Once fully dry, thread the looped ribbon through. This is probably the most tricky of the three decorations and the most time consuming, as to get results like the ones shown below, at least four layers of glitter glue and two of paint will need to be applied. That said, I think it's definitely worth the effort...


How to make the sweet wrapper discs  
Sweet wrappers! Who wouldn't have a few of these lying about the place?
 
Firstly find a template for your discs [I used a jam jar lid], then pencil around them onto pieces of old cardboard and cut the circles out. Then, cut out the same size circles on the sweet wrappers. Remember here, that you'll need a circle for each side. For these I chose gold paper for one side and different colours for the other. An especially nice idea for children to make these as gifts, is to leave one side blank or cover with plane paper, and write a Merry Christmas message on.
  
 
Next, stick the wrappers onto the cardboard and then [if desired] you can decorate round the edges with glitter glue. When fully dry, create a hole for the ribbon, a proper paper punch is by far the best way, and as long it's not too thick, should work fine on the cardboard.
 
 
Festive DIY craft post part two will follow soon....