Monday 21 December 2020

Let's Make... Christmas decorations! PART THREE

Here's the third and last of my festive "Let's make..." posts for this year and I just might have saved the best till last! So, can you guess what everyday object I used to make this exquisite garland and sunburst star decoration?


Can you guess?


Oh yes, it's the humble tin foil pie tray!
And boy, have I had fun being creative with these!

 I used meat pie foil trays for the garland as these are larger and then used dinky little mince pie [or any cake] trays for the Christmas tree decorations.

Here's a pictorial guide to the basics...


A silver and red tray makes for a very dramatic style


Make sure not to waste the scraps! You can use the round base to make more decorations. The foil is tricky to cut and the edges can be sharp so parental guidance needed for children. Also, take care once cut, these beautiful decorations can be crumpled out of shape with very little effort.


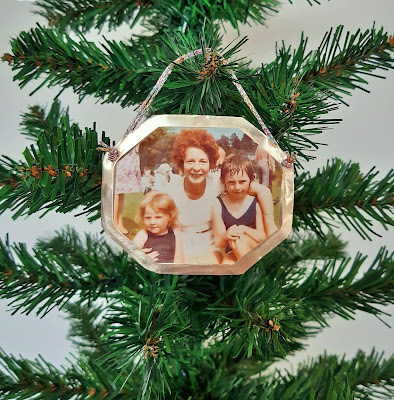
Before I close, here's one more decoration I made from a foil tray but it wasn't a pie tin this time. Look at these beautiful photo frames - just the perfect size to hang on a Christmas tree with images of loved ones glued to the front. Can you guess what I used? To cat owners, the shape might be a bit of a give-away...


Yes, it's that distinctive SHEBA cat food container! 
See below for pictorial guide but really, all I did was cut around the base, glue my chosen image to the front and then gently pierce to holes to thread the ribbon through.


My beloved Dad circa 1985 [no longer with us]

My beloved Aunty Margaret [no longer with us] with my two sisters back in the 1970s

Image of the angel my mother had on the top of her Christmas tree from when she was a child back in the 1940s

🎅🎅🎅

So that's IT. 
I can do no more! 
I'm crafted out and exhausted... a husk in a pinafore dress 😅 *

💕💕💕

Go on, have a go at some of these simple ideas, they really do make you feel better.
During this unsettling and  frightening time, return to the child you were and make something pretty for the tree 🎄🎇🎄

Stay safe everyone and Merry Christmas xxx


* Quote from Dinner Ladies [written by Victoria Wood]


Thursday 17 December 2020

Let's Make... Christmas decorations! PART TWO

In Part One of this festive trio of "Let's make..." posts, I waxed lyrical about how much I love the run-up to Christmas, almost more than the day itself. Those mad festive weeks bursting with late night shopping, 70s & 80s Christmas anthems playing on a loop EVERYWHERE, works parties, putting the decorations up, Sony Movie Channel changing to Sony Christmas Movies, writing cards and packing presents. I just love everything about the build-up.

In Part One I also shared my ideas on making festive paper bunting that really does make the cutest gifts so please take a look. In this post post I'm gong to look at Christmas tree decorations made from a very unusual, everyday item. Take a look, can you guess what the item is?


Yes, these pretty decorations are made from take-away cup lids! 

The one on the left is from COSTA [obvs] and the one on the right is from MacDonalds. This project might be a little tricky for children so I would definitely suggest adult supervision, mostly because the plastic can be tough to cut and the edges of the cut plastic are a bit sharp. Here's the COSTA one first...


Glitter gluing around the rim can be incredibly fiddly so GO SLOW [and use magnifier specs if your eyes need help like mine]! I always use the same glitter glue, it's called STICKLES and after trying many other cheaper alternatives, I always return to it. 

Now be warned, it will take overnight to completely dry so you'll need patience [not easy for children]. But it's worth it,  drying diamond hard and catching the light like nothing else. 

You can purchase it via Create and Craft or on Amazon 


Next you need to puncture a tiny hole to thread a loop through - again very tricky, adult supervision needed. Also, you can stick on anything else sparkly you might have to hand :)


I used the prettiest white and gold twine as a loop and then added a little golden bow


Unique, recycled Christmas tree decoration and the perfect little gift for the COSTA obsessive!


Now here's the McDondalds cup lid and it's pretty much the same method as with the COSTA cup except that this one had a raised circle in the center that I decided to cut out.


Unique, recycled Christmas tree decoration and perfect little gift for the MacDonald's obsessive!


HAPPY FESTIVE CRAFTING!


Saturday 5 December 2020

Let's Make... Christmas decorations! PART ONE

Ooh it's THAT time of year again! What's even better than Christmas? The lead-up to Christmas of course! This stems from my Dad who always started the festive prep early because finances tended to be a bit tight. Sometime during late August, a shelf would be cleared in the pantry and over the weeks we'd watch with shining eyes as it filled with all manner of indulgent, glittering comestibles like pickles, crisps, nuts, mince pies, sherry, pop and... wonder of wonders... selection boxes!  That excitement and anticipation has never left me and in adult life has transformed itself into a more creative outlet, I just LOVE LOVE LOVE doing Christmas craft. This activity is always better and more satisfying if you can use recycled materials and you'll never believe what you can transform with a little imagination. All this brings back memories of coming home from school clutching a festive candle made from a toilet roll, cotton wool and a bit of glitter - anyone else remember those? 

This year I have three lovely ideas to inspire you but instead of one great long rambling post, I'm going to spread them over three perfectly formed little posts, and the first of these is...

Miniature festive paper bunting!

I've never made these before but wished I had as they turned out wonderful! Just take a look...


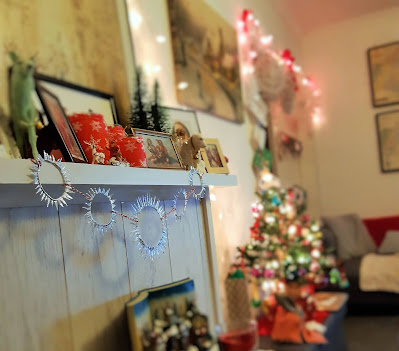
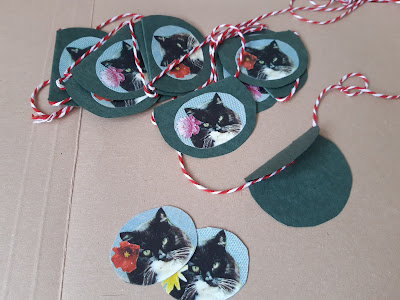
This particular semi-circle design was very easy and actually, you could just cut out foil [or colored paper] circles, glue them up and fold them over a length of string or ribbon. However, because there'd be no weight in the circles, they'd probably curl up wouldn't hang as well as these. The only thing I did differently was to cut out semi-circles of card and slot them in before closing and sticking the paper down.


In the images above you can see how I used an old jar lid to template a circle, then halved the shape to create semi-circles of slightly heavier card for a bit of weight. You can see here that I also used pretty red and white festive twine but plain jute string and ribbon works just as well. 

Please note that the reason I call these buntings "miniature" is because they're not very long, the length is only around 4ft which is perfect for over a fire-place or door. 

Also, how lovely is the gold and silver paper? Any ideas where this came from? Well, the gold paper previously covered a large bar of chocolate and the silver? You'll never guess!


STOCK CUBE PAPERS! 


I'm such a magpie when it comes to collecting papers, chocolate and sweet wrappers, bits of foil, ribbon and string. They don't take up much space and make great craft materials!

My next bunting is with the more traditional triangular shaped flags and the method is only slightly different. Here you draw out your basic flag template and then add a little section on the top to fold over the string. 


A little tip here, these photos show the thicker card as being cut exactly the same flag shape as the silver paper. However, if you do this, when you fold the extra section over the string and stick it down, the thicker card takes quite some pressing down before it stops popping up. So, when you cut the card out, I suggest you don't add the extra section at the top, then you'll only be folding and sticking down the thinner silver paper. 


After making the gold and silver flag bunting, I found I had a lot of triangular off-cuts and not liking to waste anything, I decided to use them in this festive icicle design... 


Of course, you can use any design to make pretty bunting and being a crafter, I always have scraps of images from previous projects. For these next few strings I used an image of an old and beloved cat [his name was Marlon Savage]. Years ago, I used his portrait, adding flowers to make him look coquettish, on the prettiest little oval brooches and I had a number of the images left... 


Here's a smaller, more delicate string ...


So there you go, my first festive "Let's make..." post, I do hope you enjoyed it. In these challenging COVID times, we're all feeling anxious and nervy, and for me, concentrating on these crafts calms my mind and my heart AND as I'll be giving these away as Christmas gifts, I'm already making headway on my festive to-do list so it's a win win :) 

This particular craft is great for children and, instead of the extra fuss of putting in thicker card, children can use much smaller shapes and put them on longer strings to decorate a Christmas tree! 

HAPPY CRAFTING!

Epilogue:

A few years ago, I published two posts on creating Christmas tree decorations from everyday household items and you can read them here: 

Let's make... Christmas tree decorations [part1] 2016 

Let's make... Christmas tree decorations [part2] 2016


Some of my childhood Christmas memories <3